

How to Install SalesGroup AI on Joomla
In this guide, we’ll show you how to install SalesGroup AI on Joomla website. By following these steps, you’ll have a fully functional AI assistant ready to enhance customer interactions on your Joomla site.
Table of Contents
Step 1: Sign Up or Log In to SalesGroup AI
Before you begin, make sure you have an active SalesGroup AI account.
- New User: Sign up for a free trial by visiting SalesGroup.ai.
- Existing User: Log in using your credentials.
Related: How to Install SalesGroup.ai on Wix
Step 2: Access Your Dashboard
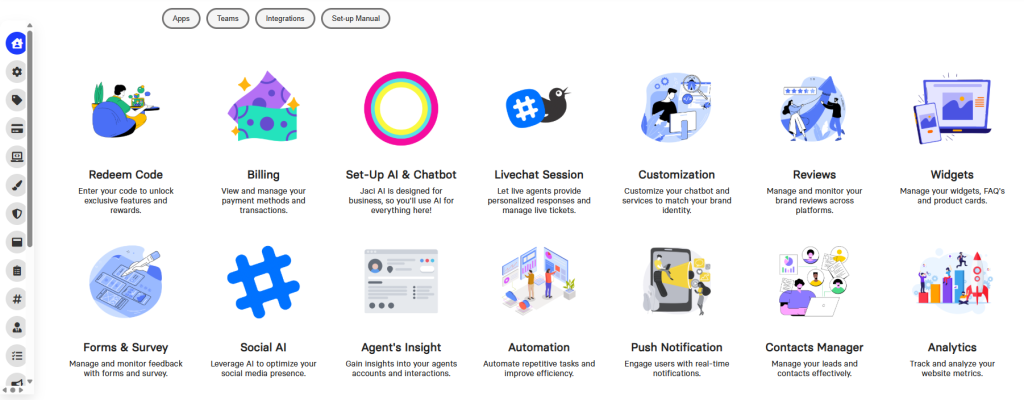
After logging in, you’ll be directed to the SalesGroup AI dashboard. Here, you can manage and configure your AI chatbot.
Step 3: Train Your AI Chatbot
To ensure your chatbot provides the best responses, you need to train it with relevant business data:
- Navigate to “Set up AI Chatbot”: From the dashboard’s menu, click on it.
- Add Basic Business Information: Enter details about your business, such as:
- Products and services
- FAQ responses
- Contact information
- Optional: Add your sitemap URL (e.g., https://www.example.com/sitemap.xml) to allow the AI to crawl and understand the site’s structure.

Step 4: Customize Your Chatbot
Further personalize your chatbot by:
- Naming the Chatbot: Give your AI assistant a custom name.
- Adding FAQs: Insert frequently asked questions to help the AI provide relevant and accurate responses.
- Adding Contact Information: Include customer service details such as phone numbers a’
- nd social media links.

Step 5: Generate the Chatbot Code
Once your chatbot is trained and customized, it’s time to generate the code for installation:
- Click “Generate Code”: This will create a JavaScript code snippet for your chatbot.
- Copy the Code: Once the code is generated, copy it for later use.
Step 6: Install the Chatbot on Your Joomla Website
Step 6.1: Access the Joomla Administrator Panel
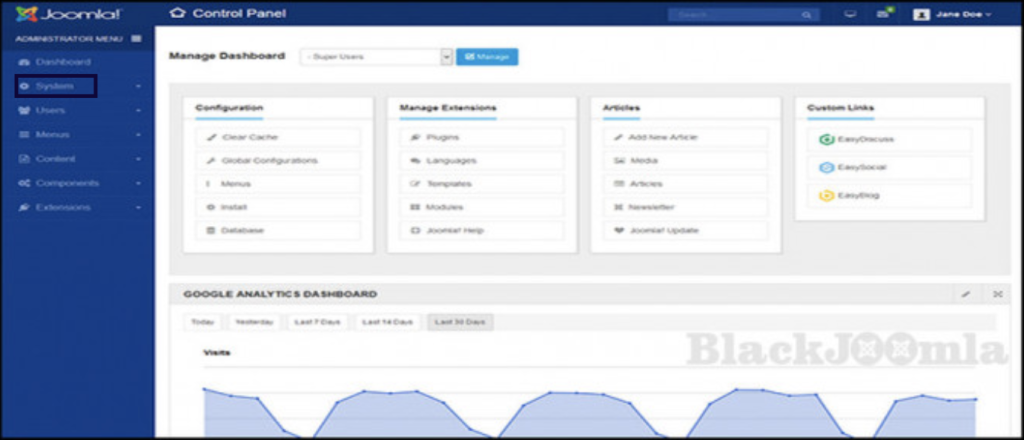
- Log in to your Joomla admin panel by navigating to yourdomain.com/administrator.
- On the dashboard, Navigate to Systems
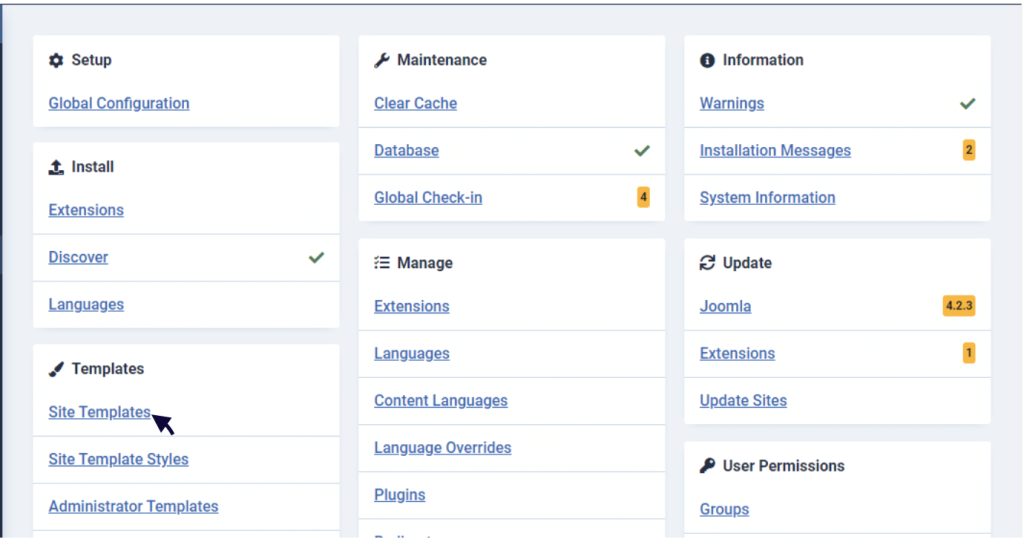
- go to the Extensions menu and select SiteTemplates > Templates from the dropdown.
Step 6.2: Edit the Template to Add the Chatbot Script
- In the template manager, select the active template you are using for your Joomla site.
- From the template files, locate the index.php file (this file controls the structure of your site’s pages).
- Open the index.php file in the editor.
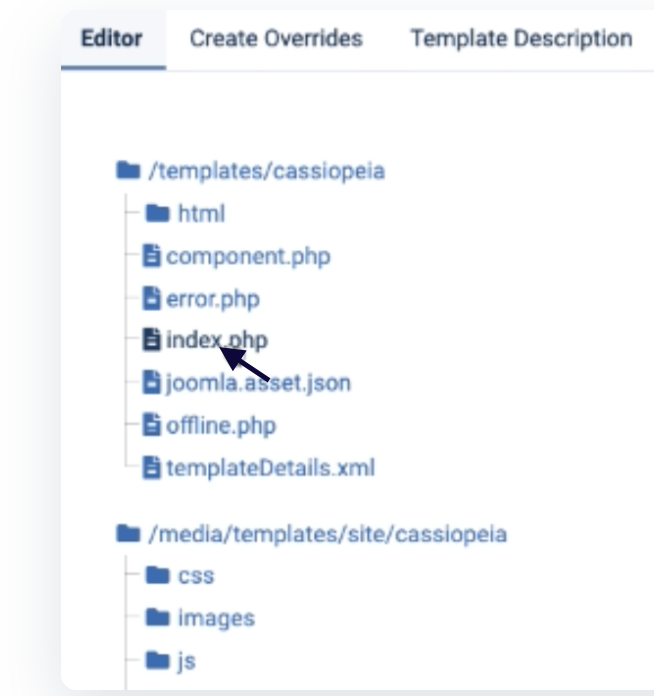
Step 6.3: Add the Chatbot Script to Your Joomla Template
- Find the closing </head> tag in your template file.
- Just above this tag, paste the SalesGroup AI chatbot code that you generated earlier.
- Save your changes by clicking Save & Close.
Step 6.4: Publish Changes
After saving the template changes, visit your website to ensure the SalesGroup.ai chatbot script is active and visible on the front end.
Step 7: Test the Chatbot
Once the code is installed, open your Joomla website and check if the chatbot appears. It should now be visible and ready to assist visitors with their queries.
Step 8: Monitor and Optimize
From your SalesGroup AI dashboard, you can monitor your chatbot’s performance, make updates, and train it further as needed. You can also fine-tune responses and add new data to improve its performance over time.
Related post:
- How to Install SalesGroup AI on Shopify.
- How to install SalesGroup AI on Squarespace
- How to install Jaci AI on Telegram

Need Assistance?
If you experience any issues during installation, our customer support team is available to assist you. Reach out through our help center or chat support, and we’ll ensure a smooth integration process.
