

How to Install SalesGroup AI on Shopify.
In this guide, we’ll show you how to install SalesGroup AI on Shopify . By following these steps, you’ll have a fully functional AI assistant ready to enhance customer interactions on your Shopify site.
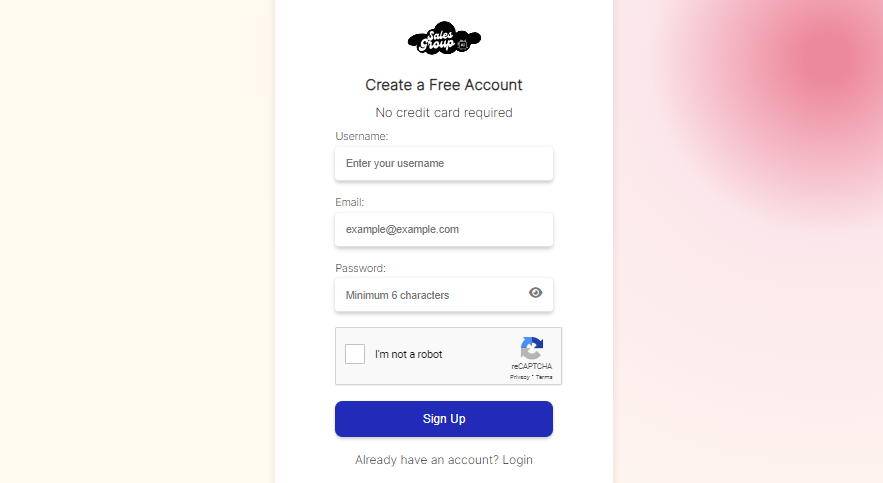
Step 1: Log in to your account
To begin, navigate to the SalesGroup AI website and log into your account or read this guide here. Once logged in, you’ll be directed to the AI Playground. This is the central hub where you can set up and customize your AI-powered chatbot.
Step 2: Configure AI Playground
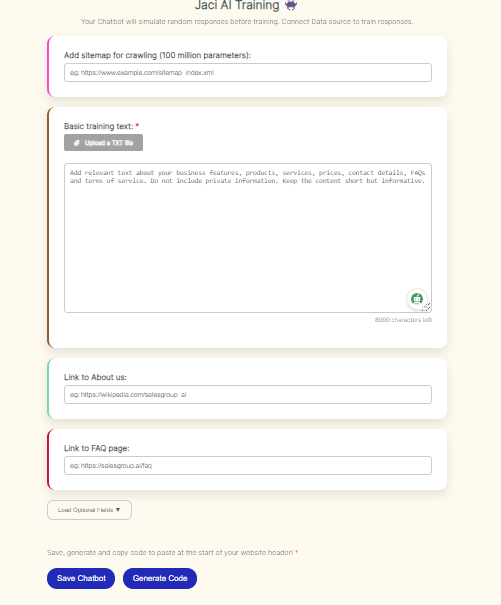
In the AI Playground, you’ll find options to customize your chatbot’s behavior, appearance, and functionality. Fill in the necessary information, such as:
- Training Data: Upload or enter any training data that the AI will use to interact with customers. This ensures the chatbot provides accurate and personalized responses.
- Customization: Adjust the chatbot’s look and feel to align with your brand, such as its color, button design, and other visual elements.
Take your time to review the options and tweak the settings to match your brand and customer service needs.
Related: How to add SalesGroup AI on Weebly
Step 3: Save and Generate the Integration Code
Once you’ve configured the chatbot with the necessary data and customizations, click Save. After saving, SalesGroup AI will automatically generate a snippet of code. This code is what you’ll need to integrate the chatbot into your Shopify store.
- Copy the Code: Simply copy the code provided by SalesGroup AI after saving the configuration.
Step 4: Log in to Shopify
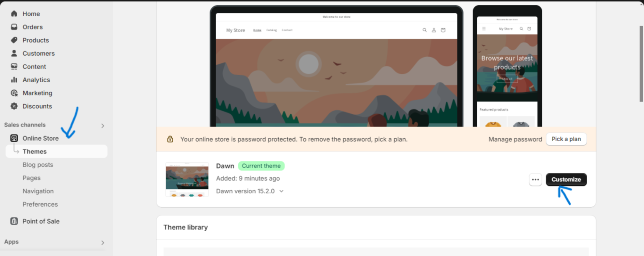
Now, head over to your Shopify dashboard by logging into your Shopify account. In the Shopify admin panel, navigate to the Online Store section in the left-hand menu and click on Themes.
Step 5: Add SalesGroup AI Code to Shopify
- Under Themes, click the Customize button next to the theme you’re currently using.
- In the theme editor, locate the three dots at the top of the page and select Edit Code.
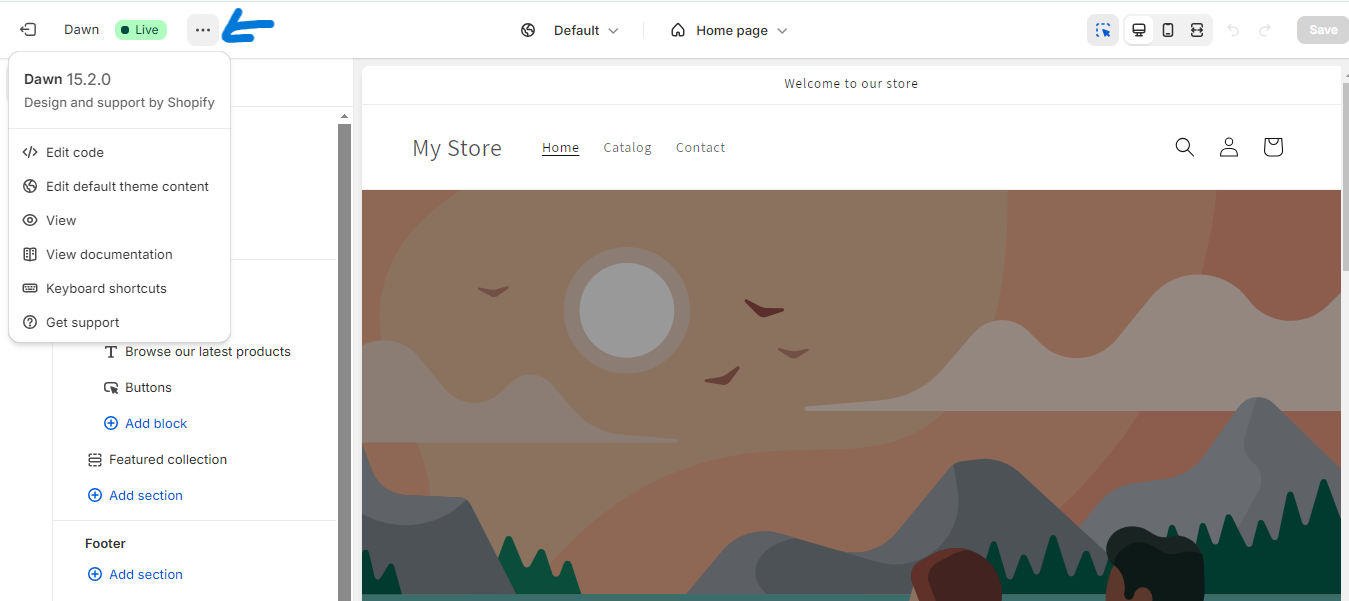
- In the Edit Code section, find the theme.liquid file under the Layout folder. This is the file that controls the overall layout of your Shopify store.
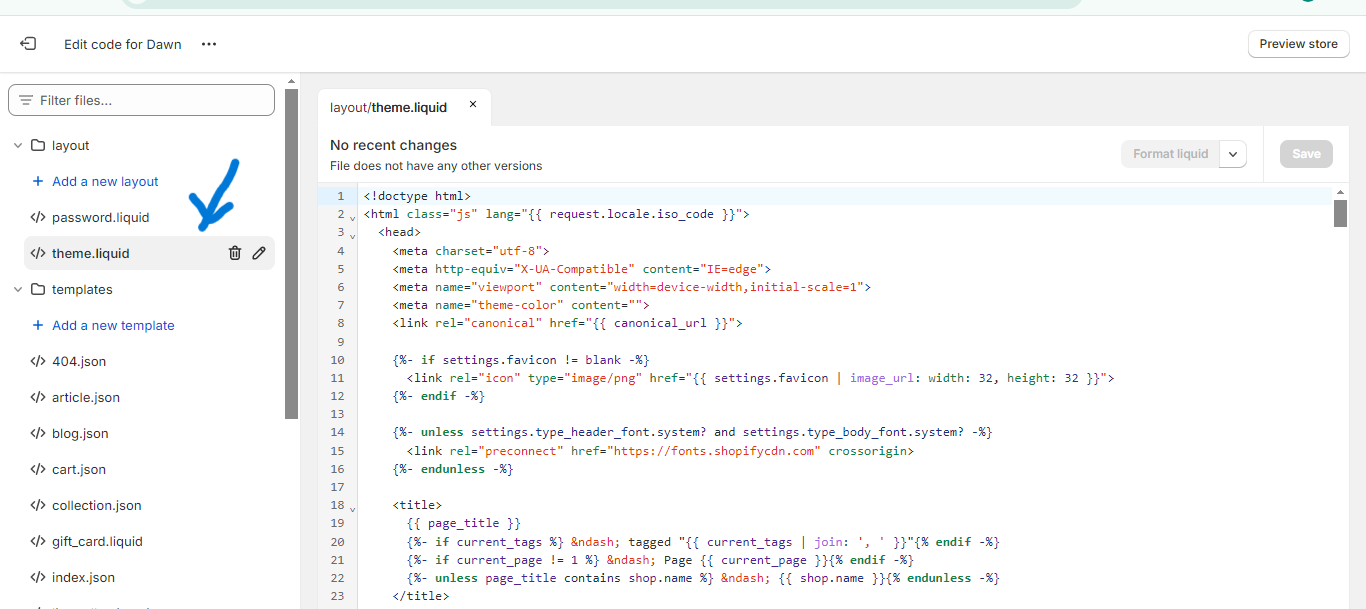
- Paste the SalesGroup AI code you copied from the AI Playground into the </body> section of your theme.liquid file. This ensures that the chatbot will be loaded on all pages of your Shopify store.
- Once the code is pasted, click Save.
Step 6: Test the Integration
After saving the changes in Shopify, navigate to your storefront and check if the SalesGroup AI chatbot appears as expected. Interact with the chatbot to ensure it is working correctly and providing the responses based on the training data you uploaded earlier.
If everything is working fine, that means your SalesGroup AI chatbot is now successfully installed in Shopify.
Related: How to install SalesGroup Ai in Magento
Need help?
By following these simple steps, you can easily install and integrate SalesGroup AI into your Shopify store. If you encounter any issues or need further customization, you can always return to the SalesGroup AI platform to adjust settings or retrain the AI as needed.
