

Creating an Account with Salesgroup.ai
Welcome to SalesGroup.ai, your AI-powered solution for seamless customer service. In this guide, we’ll take you through each step to creating an account with salesgroup.ai: from signing up to verifying your email, and setting up your profile. Our goal is to make your onboarding experience as smooth as possible, so you can quickly access the tools you need to enhance your customer interactions. Let’s get you set up and ready to explore all that SalesGroup.ai has to offer.
Table of Contents
Creating an Account
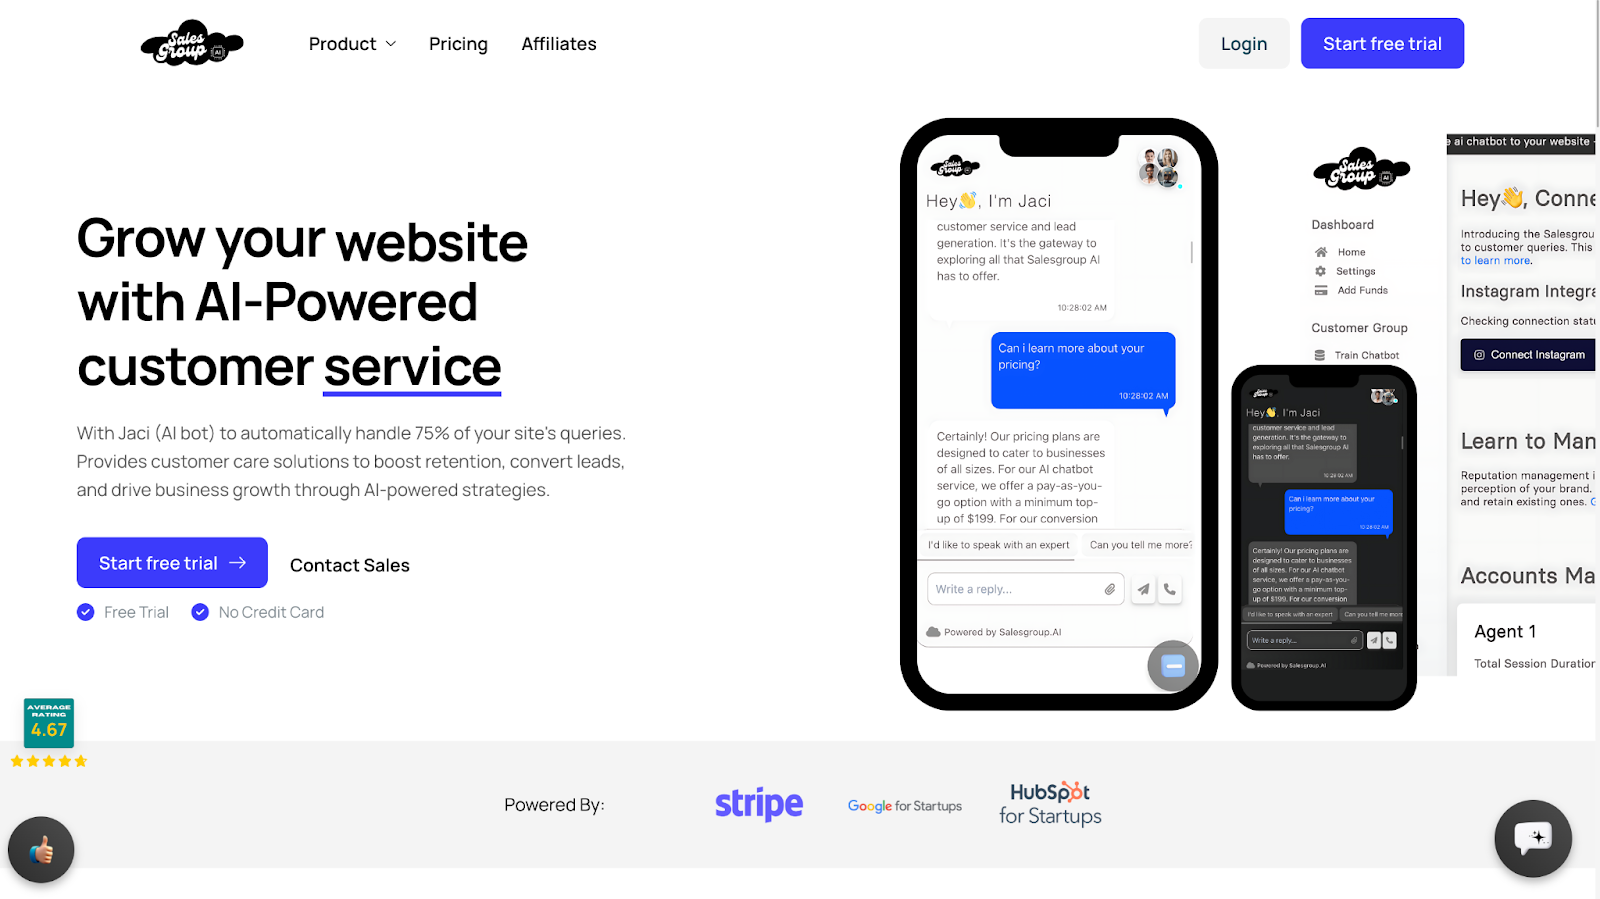
To begin, visit our website at salesgroup.ai and click on the “Start Free Trial” button. This will initiate the registration process, guiding you through each step to create your SalesGroup.ai account.
If you already have a SalesGroup.ai account, you can skip the sign-up process. Simply click on the “Login” button at the top right corner of the page, then enter your email and password to access your account directly.
Step 2: Entering Your Details
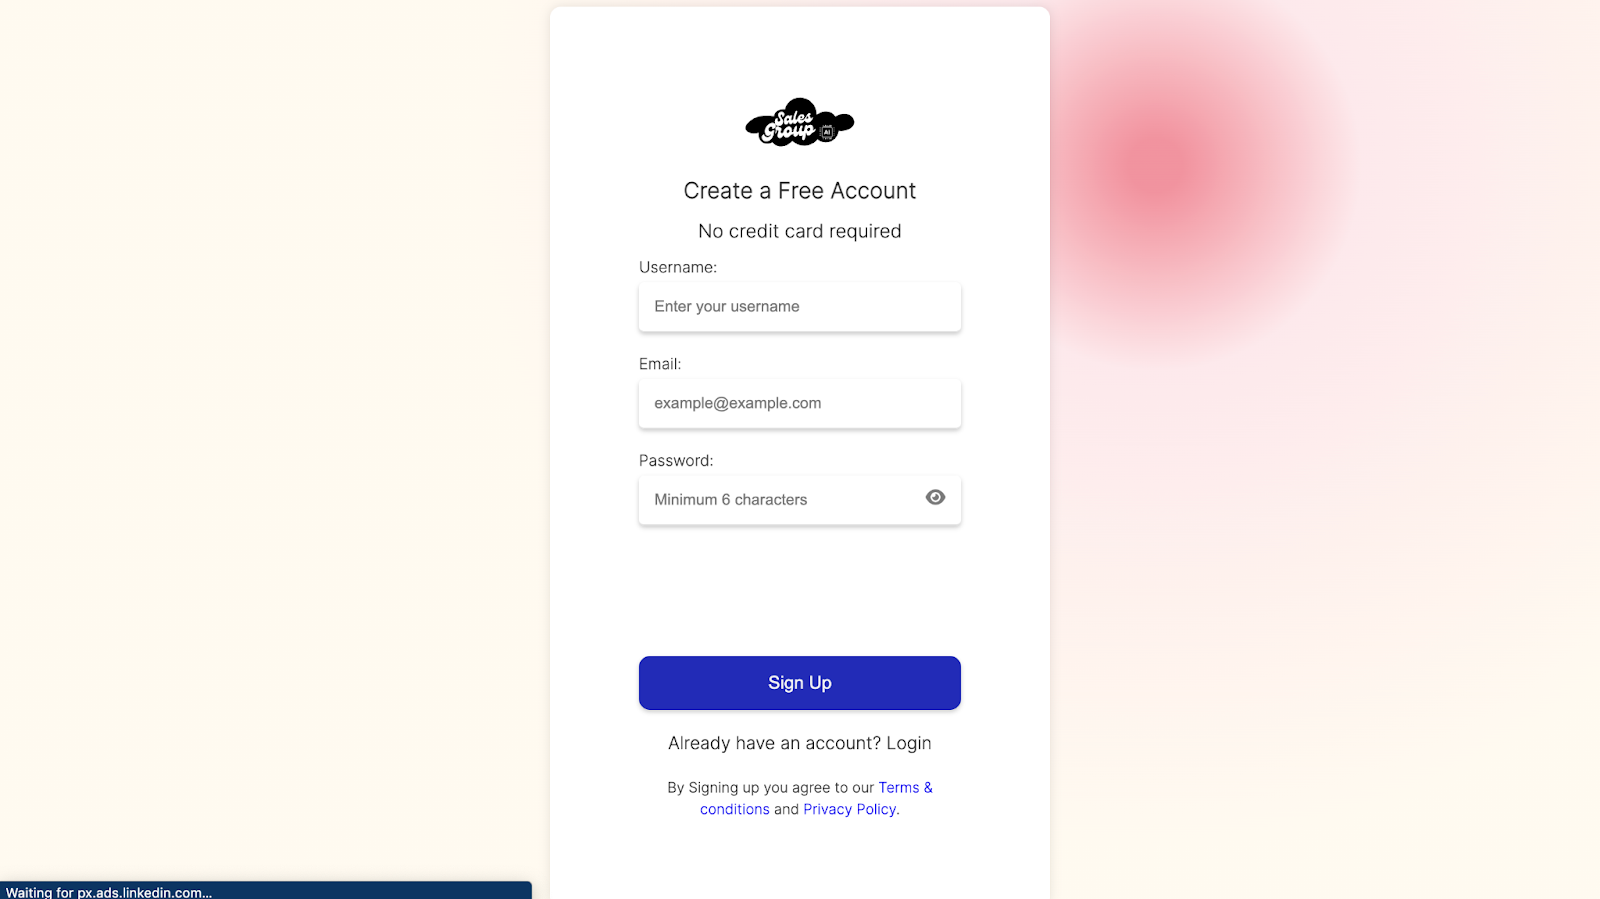
After clicking on “Start Free Trial”, a sign-up window will appear. Here, you’ll need to provide some basic information to create your account. Enter your username, email, and password in the respective fields. Once completed, review your details to ensure accuracy, then proceed to the next step to complete your registration.
Step 3: Navigating Your Dashboard
Once you’ve signed up and logged in, you’ll be welcomed with a message on your dashboard. This pop-up provides a brief introduction, suggesting resources like the tutorial documents and videos to help you get started. You’ll also see options to “Top-Up” your account and access the Help Center for further assistance. Take a moment to explore these options to familiarize yourself with the tools and features available on your dashboard.
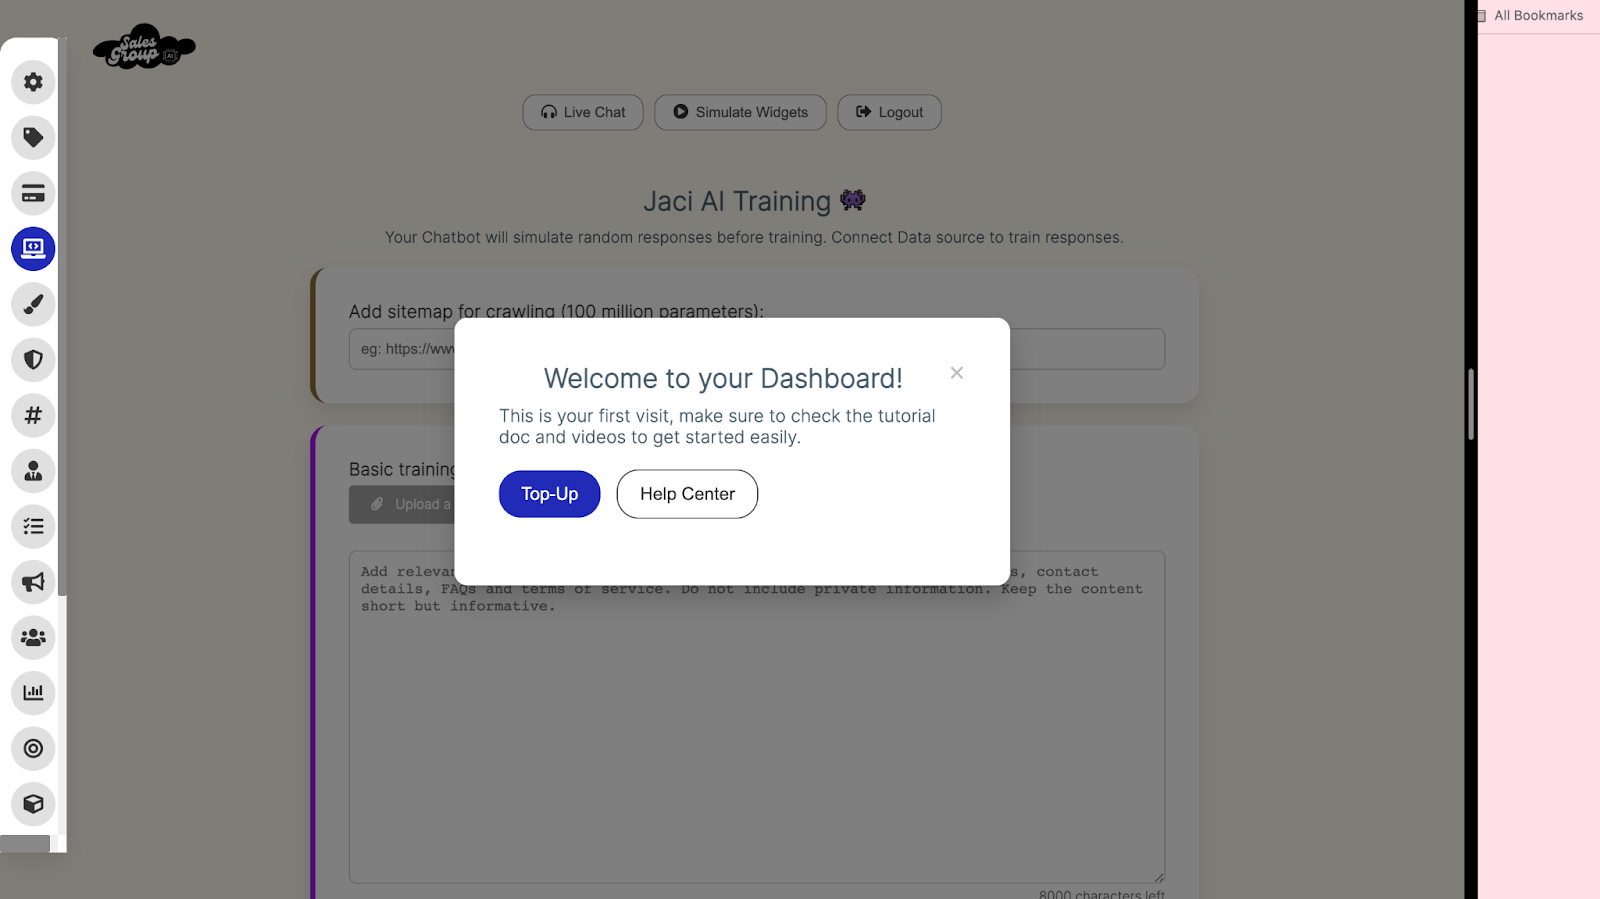
If you’d like to close the pop-up and proceed directly to your dashboard, simply click the “X” icon in the top right corner of the message.
Step 4: Understanding Your Master Dashboard
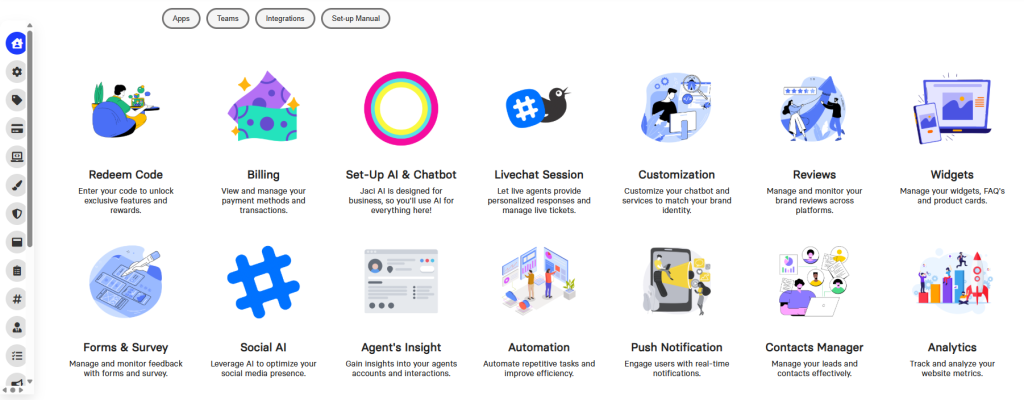
At first, your master dashboard will appear empty. As you set up your AI support agents, this dashboard will become your central hub for monitoring their stats and performance. Here, you’ll be able to track key metrics and gain insights into how effectively your AI agents are assisting your customers. Keep an eye on this area as you begin to deploy and manage your support agents.
Step 5: Adding a Live Agent Account
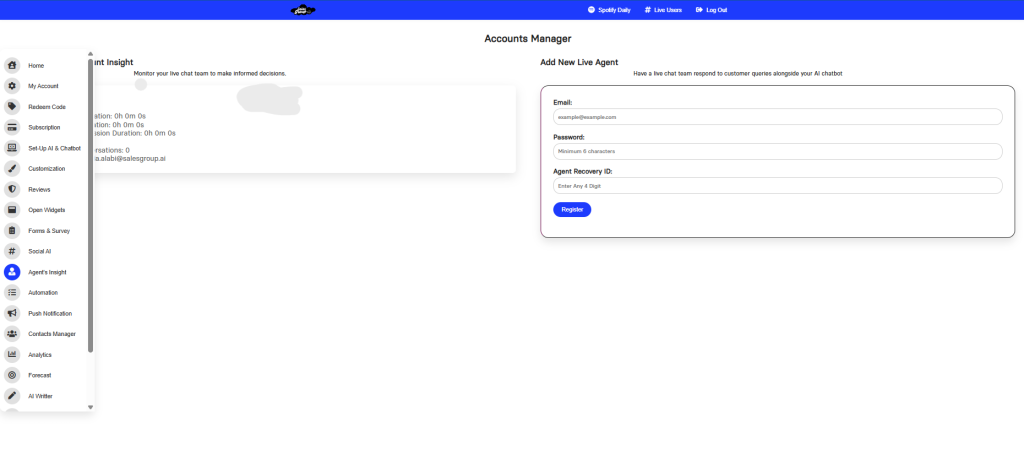
To set up a live agent to assist alongside your AI chatbot, go to the “Agents Insight” section on your dashboard. Here, you’ll see a form titled “Add New Live Agent” where you can enter the necessary details for your live agent:
- Username – Create a username for your agent.
- Email – Provide a valid email address for account notifications.
- Password – Set a secure password (minimum of 6 characters).
- Agent Recovery ID – Choose a 4-digit recovery ID for account security.
Once all details are filled in, click the “Register” button to add the live agent to your support team. This setup allows your live agent to respond to customer queries in real-time, complementing the work of your AI chatbot.
Step 7: AI Chatbot Training
Navigate to the “AI Chatbot Training” section from the sidebar on the left side of the dashboard. This section allows you to input relevant data to train the chatbot.
- Add Sitemap for Crawling:
At the top, there’s an option to “Add sitemap for crawling.” This appears to accept a sitemap URL (e.g., https://www.example.com/sitemap_index.xml) that the AI will crawl to better understand the website’s structure and content.
- Basic Training Text:
There’s a large text box titled “Basic training text,” where you are instructed to add relevant information about your business. This includes:
- Features of your business
- Products and services offered
- Prices
- Contact details
- FAQs
- Terms of service
The note advises keeping the content short but informative while avoiding the inclusion of private information.
You also have the option to upload this text via a TXT file.
- Link to About Us & FAQ Pages:
Fields for adding links to your “About us” and “FAQ” pages are provided below the training text box. These links will help the chatbot reference additional relevant information during training.
- Generate and Save Options:
At the bottom, there are two buttons: “Save Chatbot” and “Generate Code.”
- “Save Chatbot” likely stores the input training data.
- “Generate Code” produces a code snippet to be pasted at the start of your website header, enabling chatbot functionalities.

To access additional customization options, click on the “Load Optional Fields” button. This will allow you to add more data to the chatbot.
Below is a list of data you would be asked to provide
- Chatbot Name: A field to assign a custom name for the chatbot.
- Chatbot FAQ 1, 2, 3: These fields allow you to enter common questions customers typically ask. These FAQs will help the chatbot provide quick responses.
- Customer Care Number: This field is for inputting a customer care phone number for direct assistance.
- Meeting Scheduler: This field accepts a URL, such as a Calendly link, for scheduling appointments or meetings.
- Social Media Profile Links: There are fields for Instagram, Facebook, TikTok, and LinkedIn usernames or profile URLs. These links allow users to connect to the brand’s social media pages directly from the chatbot.
Once all fields are filled out, you can save the chatbot configuration or generate a code snippet for website integration.
Step 8: Integrate the AI Chatbot on Your Website
Generate and Implement the Script: After obtaining the code, simply paste it into the header section of your website’s code. This step is essential for activating the AI chatbot. If you need help, our dedicated customer support team is always available to assist you quickly and efficiently. For even faster assistance, the AI can guide you through the process.
You will find this helpful:
- How to install Salesgroup AI on Jimdo
- How to install SalesGroup Ai on WooCommerce
- How to install SalesGroup Ai in Magento
- How to Install SalesGroup AI on Shopify.
Conclusion
Integrating an AI chatbot on your website is a simple yet powerful way to enhance customer engagement, streamline support, and improve user experience. By following these steps, from customizing the chatbot’s responses to embedding the script on your site, you’ll be ready to provide instant assistance to your visitors. Remember, our support team is here to help every step of the way, ensuring a seamless and effective setup.
